Setting up reservations
In the Tebi Back Office
Set up guest capacity in the floor plan
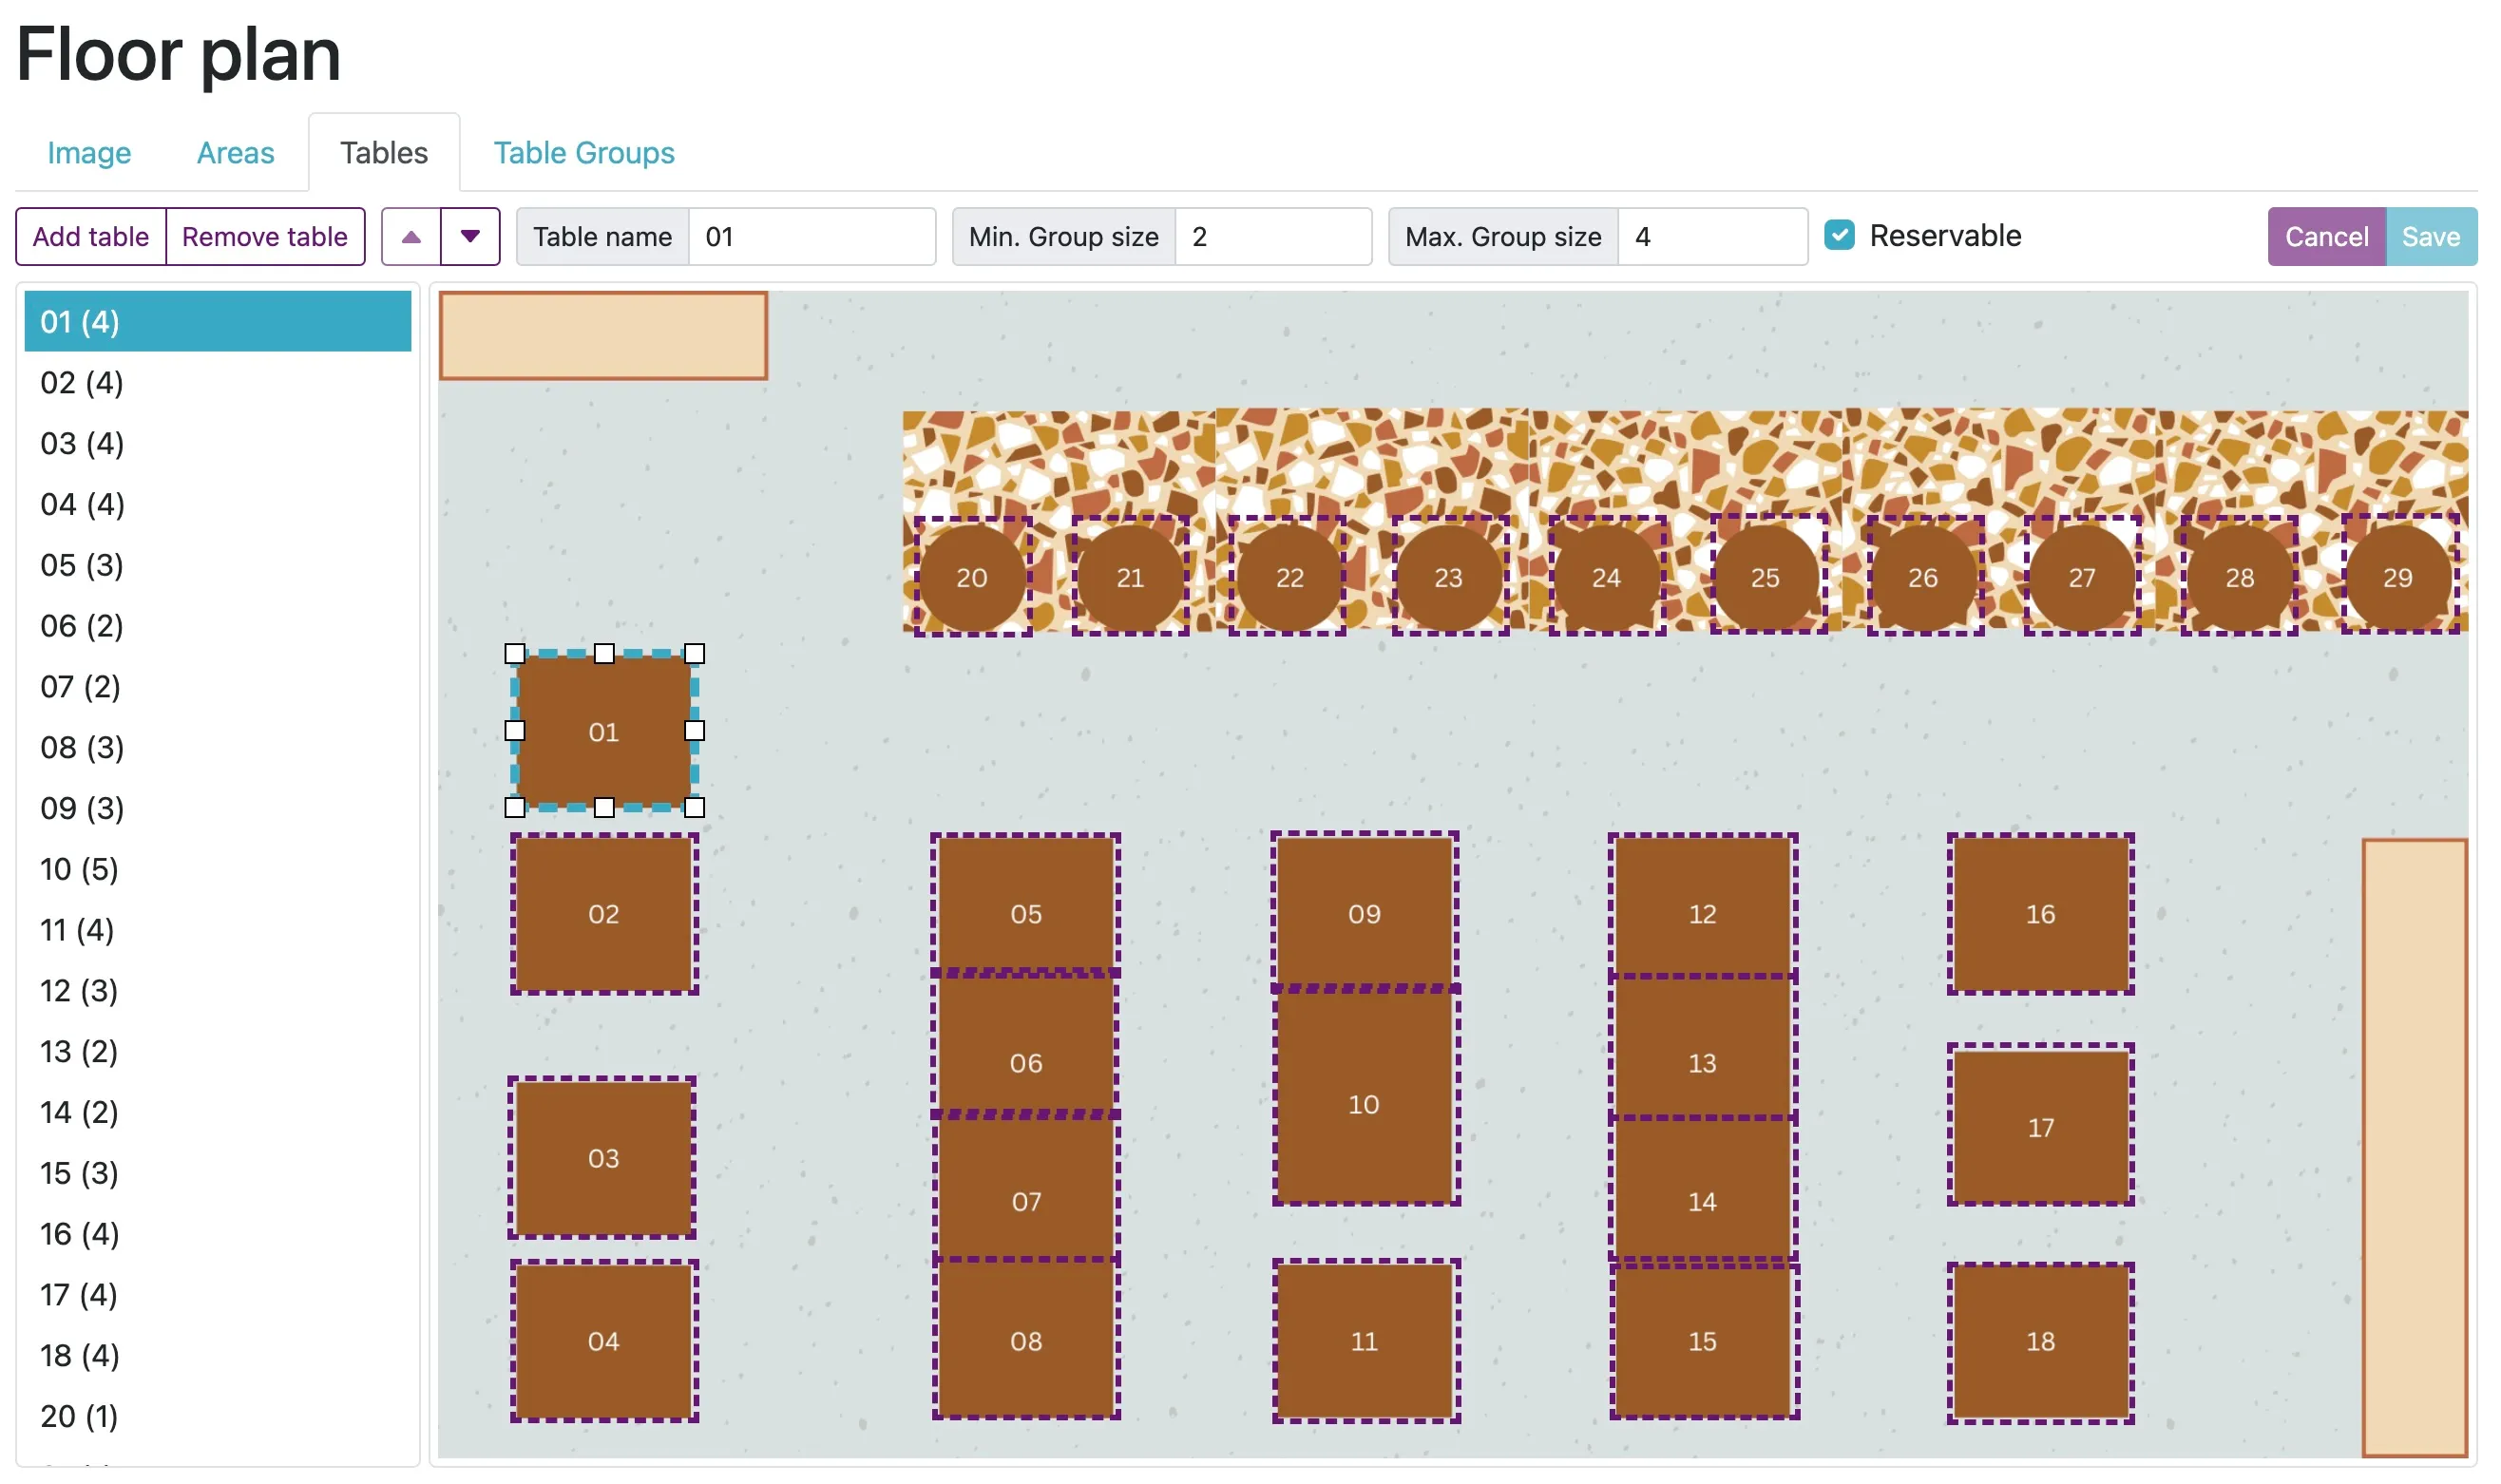
Use the Floor Plan to set up the minimum and maximum group size for each table in your business.
- Go to Tools > Floor Plan > Tables.
- For each table, select whether it is reservable and set the minimum and maximum group size that can sit at the table.
Set up table groups in the floor plan (optional)
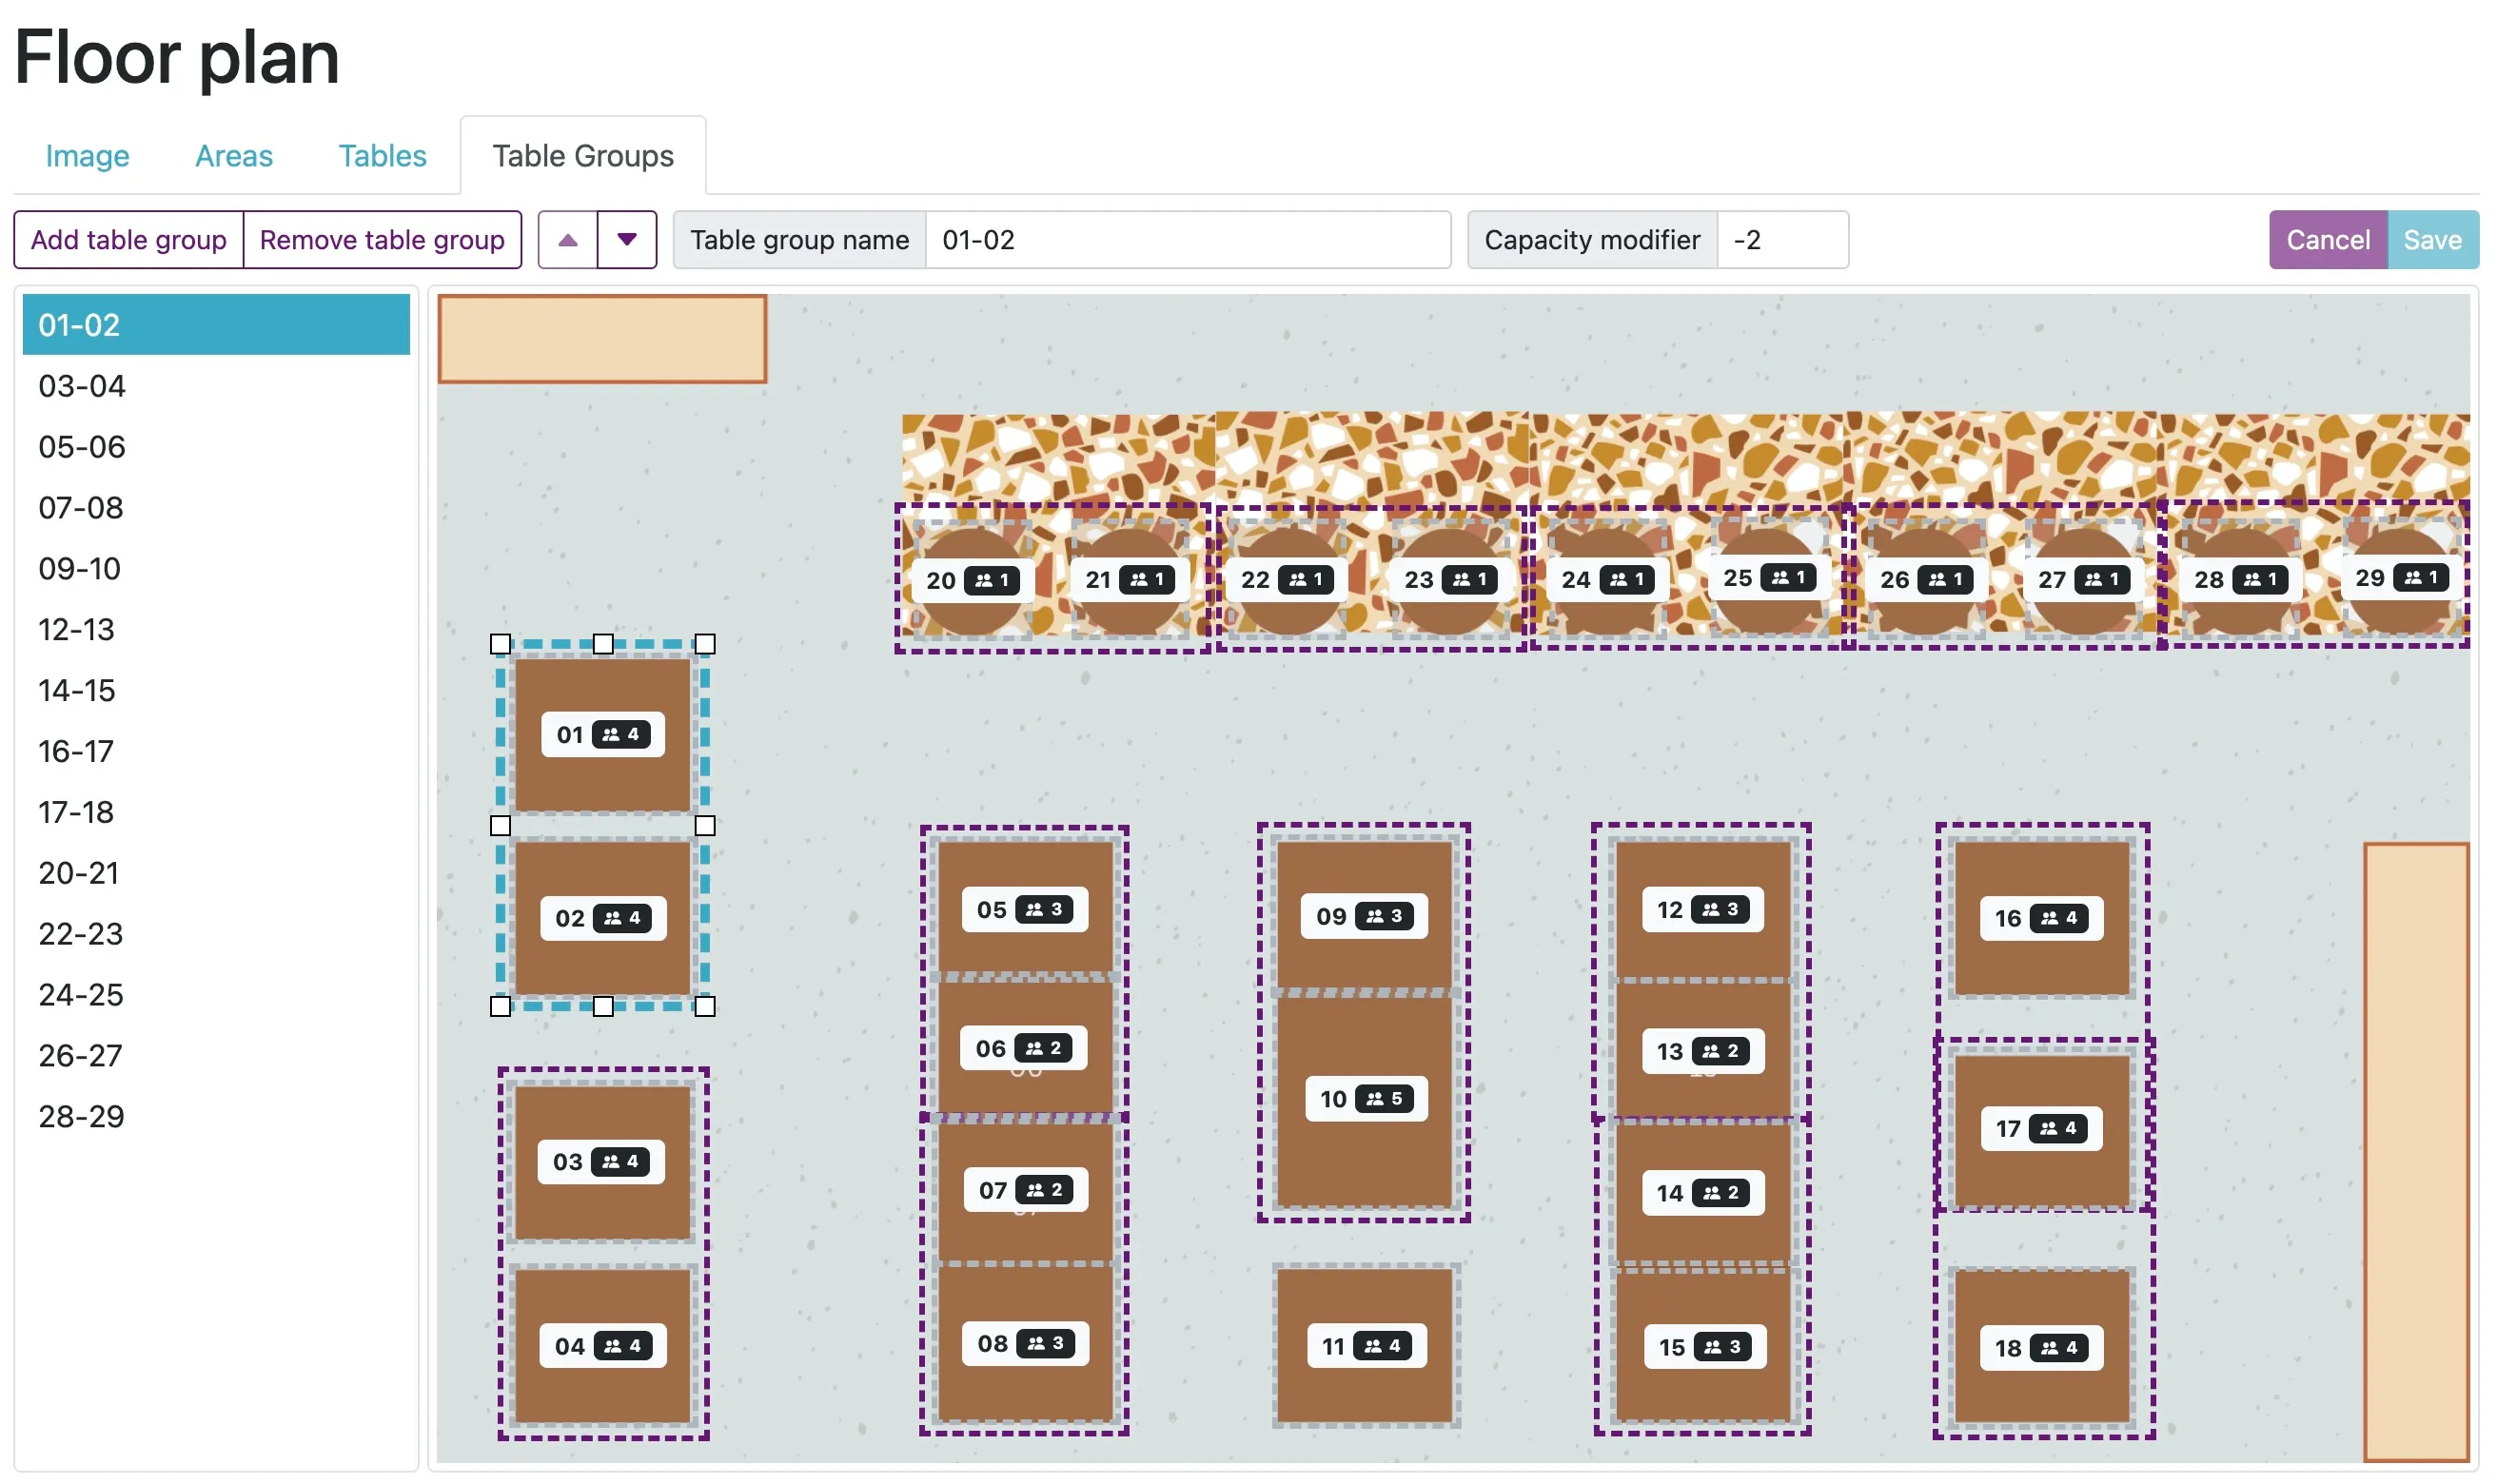
Use this to create capacity for situations where you can combine tables together to cater for (larger) groups.
For example in the image below, the tables 1 and 2 in the table group ‘01-02’ can be combined to cater for groups of between 2 and 6 people. Note: This is a lower number of guests than when the tables are reserved separately. To solve this, read about the Capacity modifier below.
-
Go to Tools > Floor Plan > Table Groups.
-
Click Add table group, type in a name for the group, and draw a box around the tables you want to combine.
-
The Capacity modifier is used to change the amount of guests that can sit at this table group as a result of moving tables. If the capacity stays the same after combining the tables, enter ‘0’ in the modifier box. If you win 2 seats, enter ‘+2’, or if you lose 2 seats, then enter ‘-2’.
In the example below, when combining tables 1 and 2, you lose 2 seats (from 8 guests to 6) so the modifier box says -2.
Set up services and availability
Services are what your customers will be reserving for; whether a meal service, a haircut or a workshop.
- Go to Reservations > Availability > Click the green button Create service.
- Enter a name (e.g., ‘Lunch’ or ‘Borrel’), then add an optional description and image for the service. These will be shown to customers in the reservation widget.
- Select the duration of the service.
- You can also add a prepayment for the reservation and select whether this is per guest or reservation.
- Determine the cancellation window in which customers will be eligible to receive a refund if they cancel.
- Save the service by clicking Create new service.
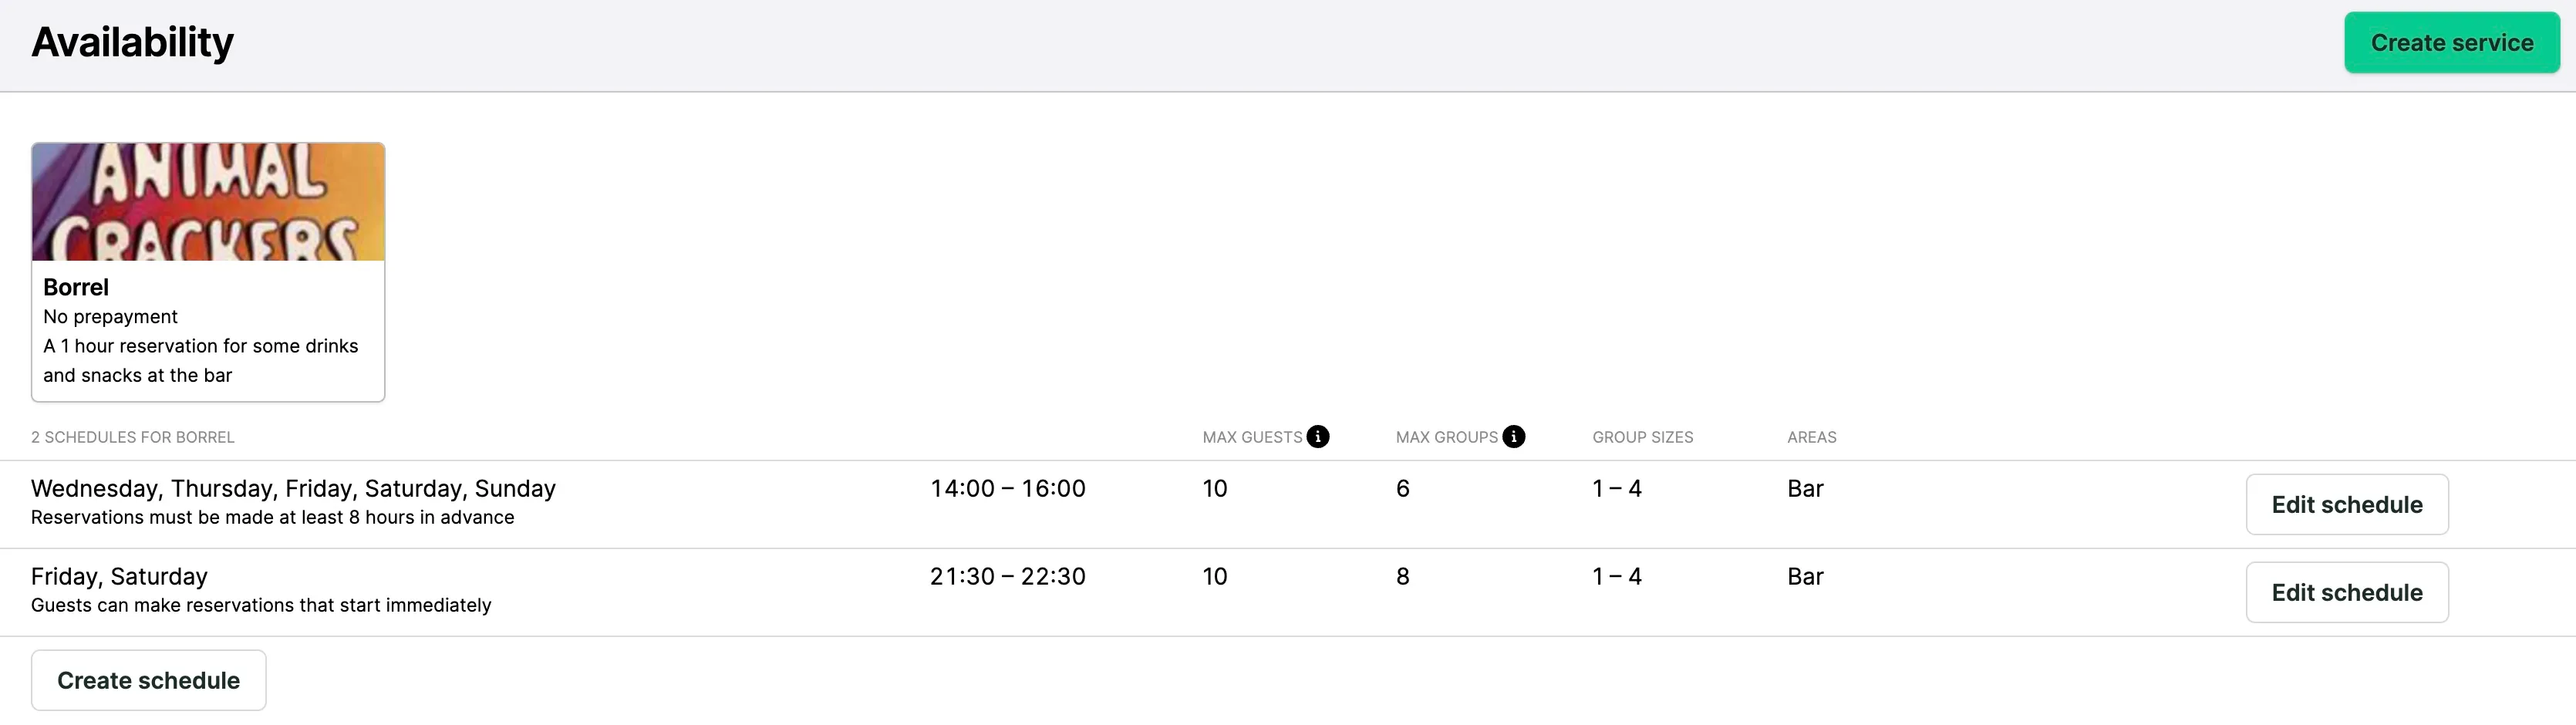
Availability is when a service is available for guests to make a reservation.
This is managed via availability schedules. Multiple schedules can be used for one or multiple services to determine when customers can reserve and to guide or limit capacity for the services involved.
- Go to Reservations > Availability > Click Create schedule underneath a service.
- Select the services you want the availability schedule to apply to.
- Seating:
- Select whether your guests will be allocated to tables. If you do not use this, table capacity determined in the Floor plan will not be used when calculating whether a customer can make reservations.
- Select the relevant seating areas for this schedule.
- Set the time, day, and date limits:
- Select if the days are recurring weekly or only available at fixed dates.
- Select at least one of the weekdays to which you want the availability schedule to apply.
- Select start and end times for reservations.
- ‘Suspend availability’ can be used to open or close reservations between certain dates.
- Booking window:
- How far in advance people can reserve.
- The latest time at which guests can reserve.
- Advanced guest limits:
- This can be used to reduce the total number of guests who can reserve and is based on your table capacity. Reduce the numbers here if you would like to save some capacity for walk-ins.
- You can also select the maximum and minimum number of guests who can reserve in a group. This is useful if you want to limit large groups from making reservations.
Pacing
To reduce overloading your staff, you can limit the number of groups who arrive at the same time with the pacing feature. To set up pacing:
- Go to Reservations > Pacing
- Set a default pacing limit: the amount of groups that can arrive every 15 minutes.
- Use the Adjust pacing if you want to change the pacing frequency for a particular time and day of the week
Advanced
Go to Reservations > Advanced to view the various advanced reservation features**.**
- Gaps and Timing: Determine the gaps between reservations and the interval times of when you allow a reservation to start.
- Reviews: Turn the toggle on to send an email to guests after their visit for them to leave an internal review.
- These reviews are listed under Reservations > Reviews. More on this here.
- Email notifications: Turn the toggle on to receive a notification when a new reservation is made.
- Waitlist: Turn the toggle on to allow guests to join a waitlist to accept a spot if other guests cancel.
- Closed day: These dates override the availability schedules for irregular days when your business is completely shut, for example on holidays. This selection will stop all reservations for the closed period window.